Boy have I missed pizza! I'm sure my husband misses it even more, because we not only don't do take out, but I haven't made homemade pizza in forever. Well that's about to change. I found and adapted an awesome recipe for Oven Fried Pizza and Simple Pizza Sauce. Both recipes are Migraine safe and MSG free. After my husband and I devoured our pizzas he instantly went into inspiration mode and started coming up with different ways to have the pizza....buffalo style, Italian style, with a cream sauce, white pizza, you name it. As we experiment I will make sure to add to the recipe.
Side Note: This is the pan I used for the pizza. I swear by it. I use it for my steaks in the winter, paella, and now oven fried pizza dough. My pan might be 12" and definitely was twice the cost when I bought it 5 years ago. Anyway....
Start with your dough first.
Oven Fried Pizza Dough (inspired by Alex Guarnaschelli)
2 1/4 teaspoons active dry yeast
1 1/2 cups warm water (about 110 degrees)
3 1/2 cups Bob's Red Mill Organic White Flour, plus about 1 cup for rolling
2 teaspoons sea salt
1/2 teaspoon ground black pepper
1 scant tablespoon organic/local honey
1 tablespoon extra virgin olive oil, plus more for coating the bowl.
In a large bowl mix the water and yeast and stir. Allow to sit about 5 minutes until the yeast is dissolved.
Using a sieve or strainer, sift about half of the flour right over the water mixture. Then with your hands mix it together. Once smooth, add the salt, pepper and honey and mix by hand to blend. Then sift the remaining flour over top and mix to blend.
Heavily flour a cutting board and turn the dough out onto the board. Knead the dough for 3 to 5 minutes adding flour as needed to prevent dough from being sticky. Once the dough is smooth and all of the ingredients are integrated, place it inside a lightly oiled bowl and cover with clear wrap. Place in a warm dry place and allow dough to rise at least 1 1/2 hours or until doubled in volume. I let mine rest for 5 hours because I left and came back to it.
Press gently on the dough and turn out onto a floured surface. Divide the dough into 2 equal portions. Roll each half into a loose ball. Cover the dough with a clean towel and allow it to rest for an additional 15 minutes.
(use this time to make the sauce- see below).
Once dough has sat 15 minutes take your cast iron pan and place it over medium high heat on your stove. Add 2 tablespoons extra virgin olive oil to the pan. Once the oil is smoking add one stretched by hand pizza dough round. Use the back of a spatula to spread the dough clear to the edge. Salt and pepper the top of the dough. Once the under side is browned flip the dough. Salt and pepper the top, add the homemade simple pizza sauce, and I then added browned ground beef that was seasoned simply with salt and pepper. Add a couple pinches of crushed red pepper flakes and once the underside is browned place the whole pan in the oven for 5-8 minutes or until pizza is done.
Repeat with remaining dough and toppings. My husband topped his the same but the last layer was mozzarella cheese, then more salt and pepper and a drizzle of extra virgin olive oil. Yum! Just remember mozzarella cheese is not migraine safe...and unless its made from pasteurized whole milk and has no preservatives it's not MSG free. You could make your own ricotta cheese and add that. I've done a layer of that below the sauce and it was delicious!
Now on to the simple sauce.
Simple Pizza Sauce: (adapted from Don Pintabona)
1 28 ounce can Bionaturae Whole Canned Tomatoes
1/4 cup Organic Spring Onions sliced thin. Using white parts too
1/2 tsp minced garlic
3-4 fresh basil leaves
1 teaspoon dried oregano
1/4 tsp or more sea salt
pinch of ground black pepper
2 tablespoons olive oil
Sauté the spring onions in the olive oil over medium heat for 3-5 minutes or until the start to turn a little brown. Add the garlic and sauté an additional minute. Take your whole tomatoes and dump them in a bowl, juice and all, and use your hands to crush the tomatoes. Add the tomatoes, basil, oregano, salt and pepper to the sauté pan. Bring to a simmer and then continue simmering on low for 15 minutes. Can be stored in the fridge for up to one week. This sauce recipe perfectly covered both pizza rounds from the recipe above.
Enjoy!!!!
Friday, September 6, 2013
Monday, August 26, 2013
Roasted Tomato Basil Soup
It's tomato season! Yummy! Are you looking for an innovative new recipe to use up all those home grown plum tomatoes? Well you've come to the right place. This recipe is zippy and fresh and totally delicious. With a side of homemade bread it hit the spot!
The original recipe inspiration came from Barefoot Contessa and here is her recipe. I didn't even try to make the original recipe, I adapted it from the get go. I've been getting better on spotting a good recipe...and boy is this a good one!
Karin's Roasted Tomato Basil Soup
Ingredients:
3 pounds ripe plum tomatoes, cut in half lengthwise (I also trimmed off the stem end)
1/4 cup plus 2 tablespoons Extra Virgin Olive Oil
1 tablespoon Sea Salt
1 1/2 teaspoons ground pepper
1 whole bunch of spring onions diced
3 teaspoons of minced garlic or 6 cloves minced
1 (28 ounce) can whole tomatoes, with their juices (Bionaturae- has no MSG or citric acid)
2 cups fresh basil leaves- I honesty didn't measure, but I don't think I used 4 cups like the original recipe called for
4 cups Homemade Chicken Stock I use this recipe but without the turnip and I use 1 bunch of spring onions instead of regular onions. I also use organic whole chicken.
Preheat the oven to 400 degrees. Place fresh plum tomatoes on baking sheet and drizzle with 1/4 cup EVOO, salt and pepper. Roast for 45 minutes.
In an 8 quart stockpot over medium heat, sauté the spring onions and garlic with 2 tablespoons of EVOO for 3-5 minutes until fragrant. Add the canned tomatoes with juice, basil and chicken stock. Add the oven-roasted tomatoes along with their juices from the baking sheet to the stockpot. Bring to a boil and simmer for 40 minutes uncovered. Let soup cool down a bit, and then add to a blender and puree until smooth. I had to do it in two batches.
To eat- I prefer mine warm. Return to stove and reheat until warmed through. I served mine with a side of toasted bread. Yummy!


Enjoy!
Fruit Pizza
Awhile back I put a challenge out there for my friends and family on Facebook to challenge me to try a new recipe. I asked people to send me their favorite dessert ideas and then I picked one and challenged myself to make it. Fruit pizza was the idea and I had never heard of it. Fruit tarts I've tasted, but never made...but fruit pizza????
So I needed recipe inspiration. That's where Pinterest came in hand. This is the original inspiration...and a mighty fine recipe just as it is. However, I adapted it to be migraine friendly and MSG free.
Here goes nothing:
Karin's Fruit Pizza
Cookie:
1 1/2 cups pure can sugar
2 1/2 cups Bob's Red Mill Organic White Flour
1/2 teaspoon Debbies Baking Powder
1/2 teaspoon sea salt
14 tablespoons organic unsalted butter, softened (I use Wegmans Organic Brand)
2 teaspoons Organic Vanilla Extract
2 large eggs
Frosting:
1/2 cup Spectrum Naturals All Vegetable Shortening, Organic
1/2 cup (1 stick) Organic Unsalted butter
1 teaspoon Organic Vanilla Extract
4 cups (1 lb) Organic Powdered Sugar Sifted- Wholesome Brand carries one variety without cornstarch
2 -3 tablespoons Organic Pasteurized Whole Milk
Instructions:
- Beat the butter and 1 1/2 cups sugar in a stand mixer until fluffy (about 3-5 minutes). Add vanilla and eggs and mix until well combined. In a separate bowl mix the flour, salt and baking powder. Add this mixture to the butter mixture and mix until just comes together. Chill the dough at least one hour, up to over night.
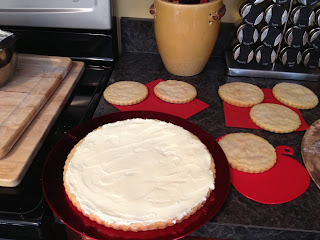
- Preheat oven to 350. Spray your tart pans with organic canola spray. (I used one 10" tart and six 4" tarts with one dough recipe). Working on a flat surface covered with organic white flour, roll your chilled dough out to shy of 1/2 inch thick. Lay greased side of tart pan bottom face down on dough. Using a knife cut dough out to size of pan. Flip over and place in tart pan. Repeat with left over dough to fill smaller tart pans.
- Sprinkle dough with a total of 2-3 tablespoons of sugar. I went for the lesser amount.
- For large pan bake 15-18 minutes. For smaller pans bake 10-12 minutes.
- When sugar cookie is done, remove from oven and take sides of tart pans off so they chill faster. Let chill at room temperature. Meanwhile prep your fruit and frosting.
- In a stand mixer mix 1/2 cup shortening and 1/2 cup softened butter together. Mix in vanilla and sifted confectioners sugar slowly. Once blended add in 2-3 tablespoons whole milk. Beat until creamy.
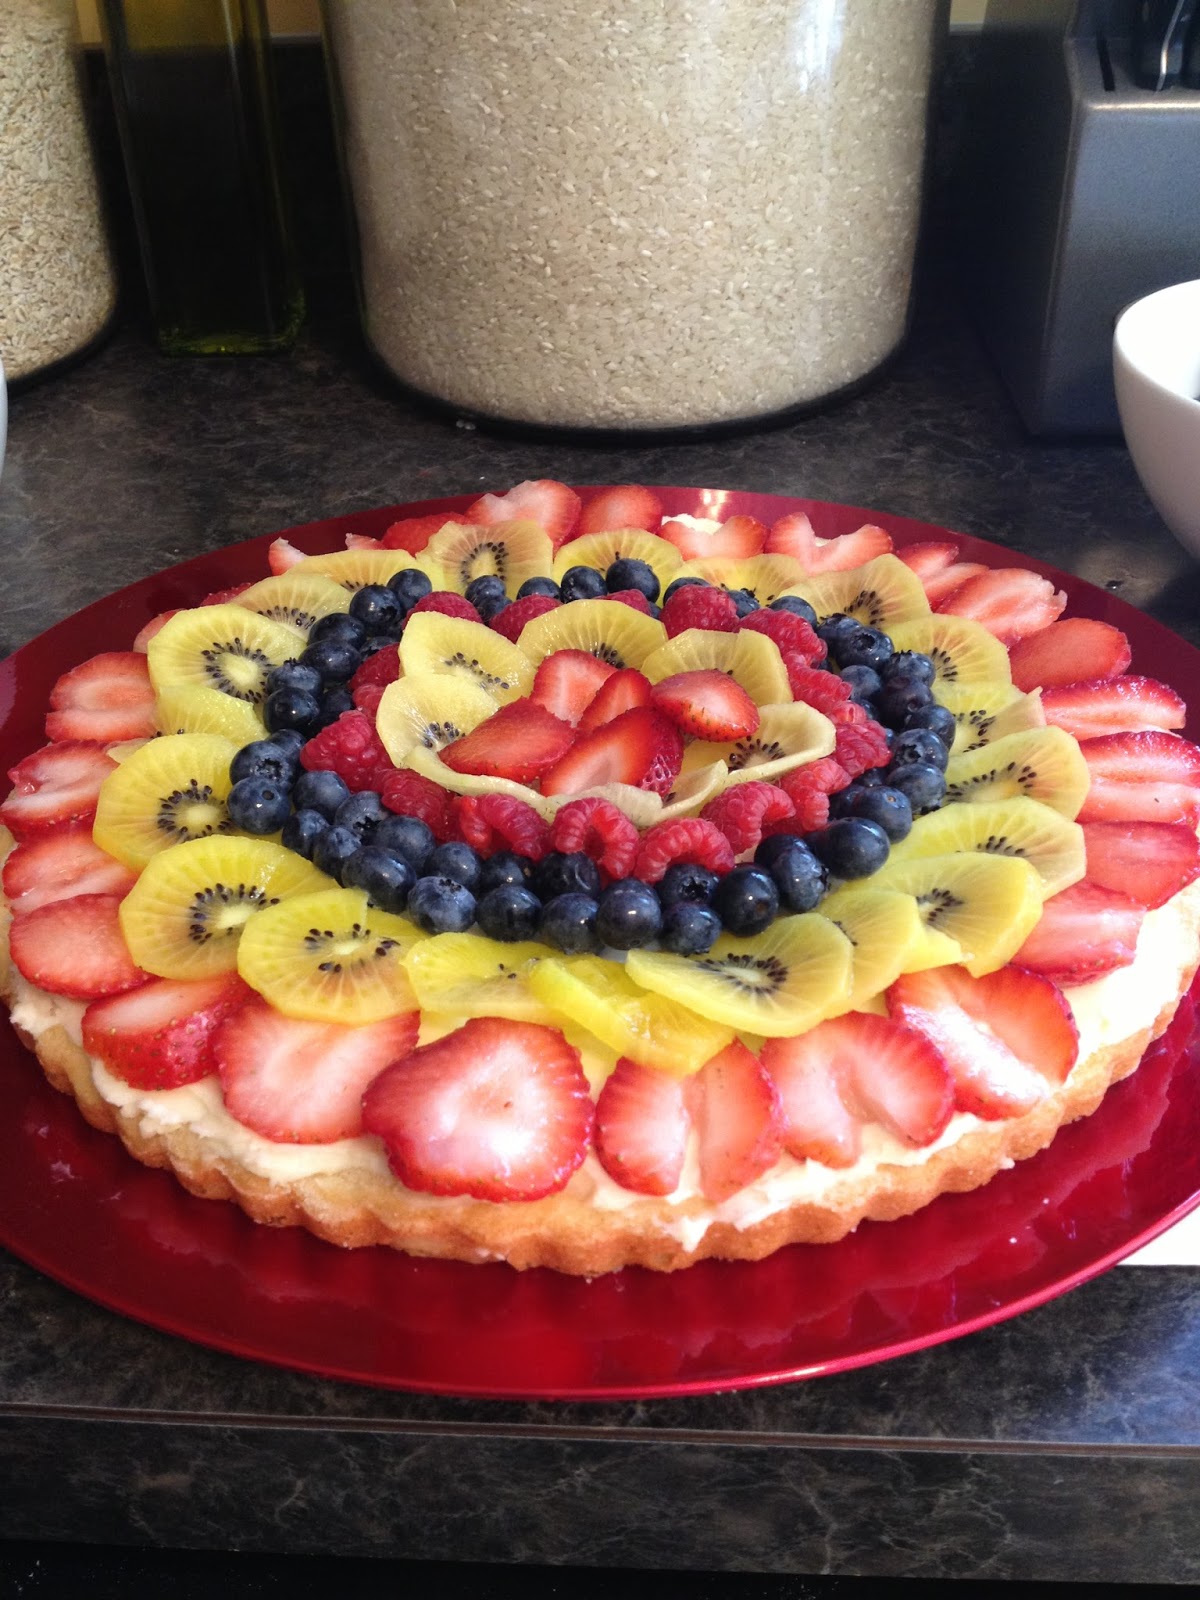
- First frost your cookies using about 1/4 inch of icing as an even layer. Then start from the outside working in and lay your strawberries, then kiwi, then blueberries, raspberries and then kiwi, then blueberries. Keep this refrigerated because of the icing. Let come to room temperature for about 5 minutes before serving.


Enjoy!
Sunday, August 25, 2013
Amazing Green Beans
I've always struggled with green beans, but I finally found a winner with a little inspiration from Tyler Florence.
Karin's Green Beans:
Take 1 pound of green beans, washed and ends trimmed. In a wok or deep sauté pan fill with water until about 1 inch from the top. Boil the water with about 1/2 tablespoon of sea salt. When water comes to a boil add the green beans and cook for 5 minutes. Green beans will be crisp, but cooked. Pour green beans into a strainer and run under cold water to stop the cooking. Meanwhile return the empty walk or sauté pan to the stove. Over medium high heat add about 1/2 - 3/4 cup of scallions diced with about 1/2 tablespoon or 2 turns of the pan of EVOO. Add 1 tsp of garlic and cook for about 3 minutes or until tender. Dish up and enjoy!
Serves about 4 people.
Saturday, August 17, 2013
Breakfast Menu
So this morning I entertained a group of ladies who are in my prayer group. I wanted to put together a nice breakfast that we could feast on while praying and catching up. The group consisted of one gluten free member, myself who is following the MSG free and Migraine free diet, and the other ladies weren't picky.
I made two 8" pans of Pumpkin Coffee Cake.
I made my Overnight Egg Casserole.
I bought organic gluten free yogurt (not migraine free) and then placed bowls of fruit (strawberries, raspberries and blueberries) with the yogurt, and gluten free granola. People were able to make their own yogurt, fruit and granola parfaits. Yum!.
Lastly, I took a pound of organic vine ripe tomatoes and placed them on a baking sheet and roasted them with a drizzle of EVOO and a sprinkling of sea salt and pepper at 350 degrees until they started to pop. I put them on top of an Organic Spring Mix (reserving the juices left behind from the tomatoes popping). I took the tomato juice, 2 tablespoons Distilled Vinegar, 6 tablespoons EVOO and a dash of sea salt and pepper and whisked until combined. Then I served this on the side along with shavings of fresh Parmesan cheese for those that can eat cheese (this cheese is not migraine safe).
This menu seemed to go well for the brunch. Sweet, salty, filling, healthy, not healthy....had it all. Menu planning for events is always hard so hopefully this menu sparks some ideas for you.
Enjoy!
Overnight Egg Casserole
Are you looking for a great, easy and very tasty dish to make for a brunch or maybe even Christmas morning. It's very adaptable too. I was searching in a gluten free book (Living Well Without Wheat, The Gluten-Free Gourmet) for a gluten free breakfast casserole and came across what looked to be an easy recipe. However, it called for cheese and I was hoping the casserole would be MSG free and Migraine free so I could enjoy the it too....two birds with one stone. It also had sausage which I couldn't have. No problem. So here is what I did.
I took a 9 x 13 baking pan and decided to make half of the casserole gluten free and half with the homemade MSG and Migraine free bread (I couldn't find a GF bread that is migraine safe or MSG free). I have a wet erase marker so I labeled the right side of the pan GF and left side non GF.
I took 100% Sunflower Oil Spray by Winona Pure and sprayed the pan. Then I took 3 slices of each bread and laid them down on their perspective sides of the dish. You could insert cheese slices (American or Swiss) on top of each slice of bread...but no cheese for me. Next took 1 tablespoon of EVOO and put it in a skillet over medium high heat. I added 1 pound of ground turkey which I seasoned with a mix of 1/2 teaspoon salt, 1/2 scant teaspoon of pepper, 1/2 teaspoon fresh ground cumin, 1/2 teaspoon fresh ground coriander. Cook until fairly cooked through. Take the meat and layer it on top if the bread. Next take 6 eggs, a dash of salt and 2 cups of Organic Pasteurized Whole Milk. Let sit in the covered in the fridge over night.
In the morning turn your oven on to 350 degrees. Once ready place the casserole in the oven uncovered and bake for 60 minutes. Take out and serve. Yummy! Whether you use gluten free bread or regular bread this was a fabulous recipe.
You can, like I said above, easily add cheese slices to the recipe or switch the turkey for sausage. It just won't be MSG free or Migraine free.
Get creative....this recipe would be good with spinach too.
Enjoy!
Monday, August 12, 2013
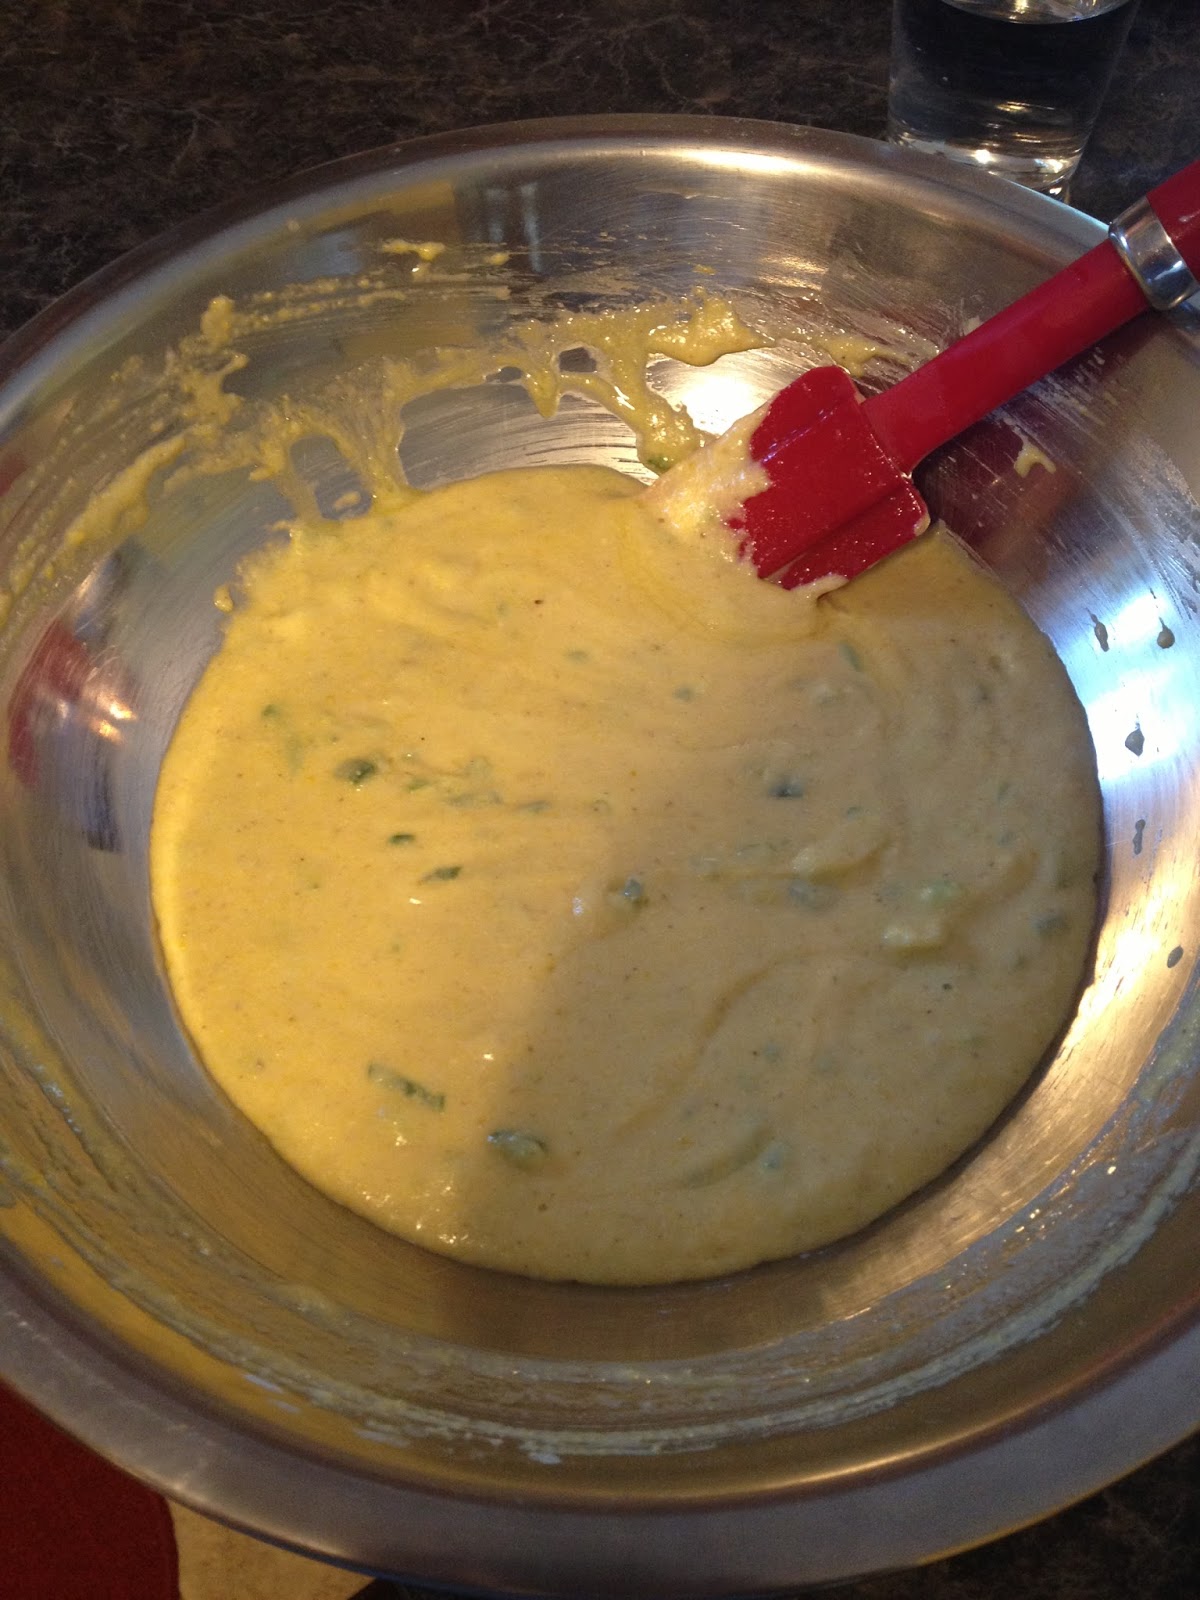
Corn Fritters
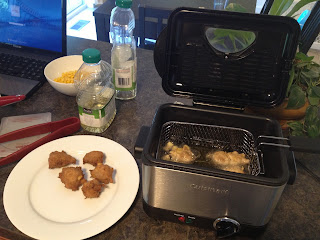
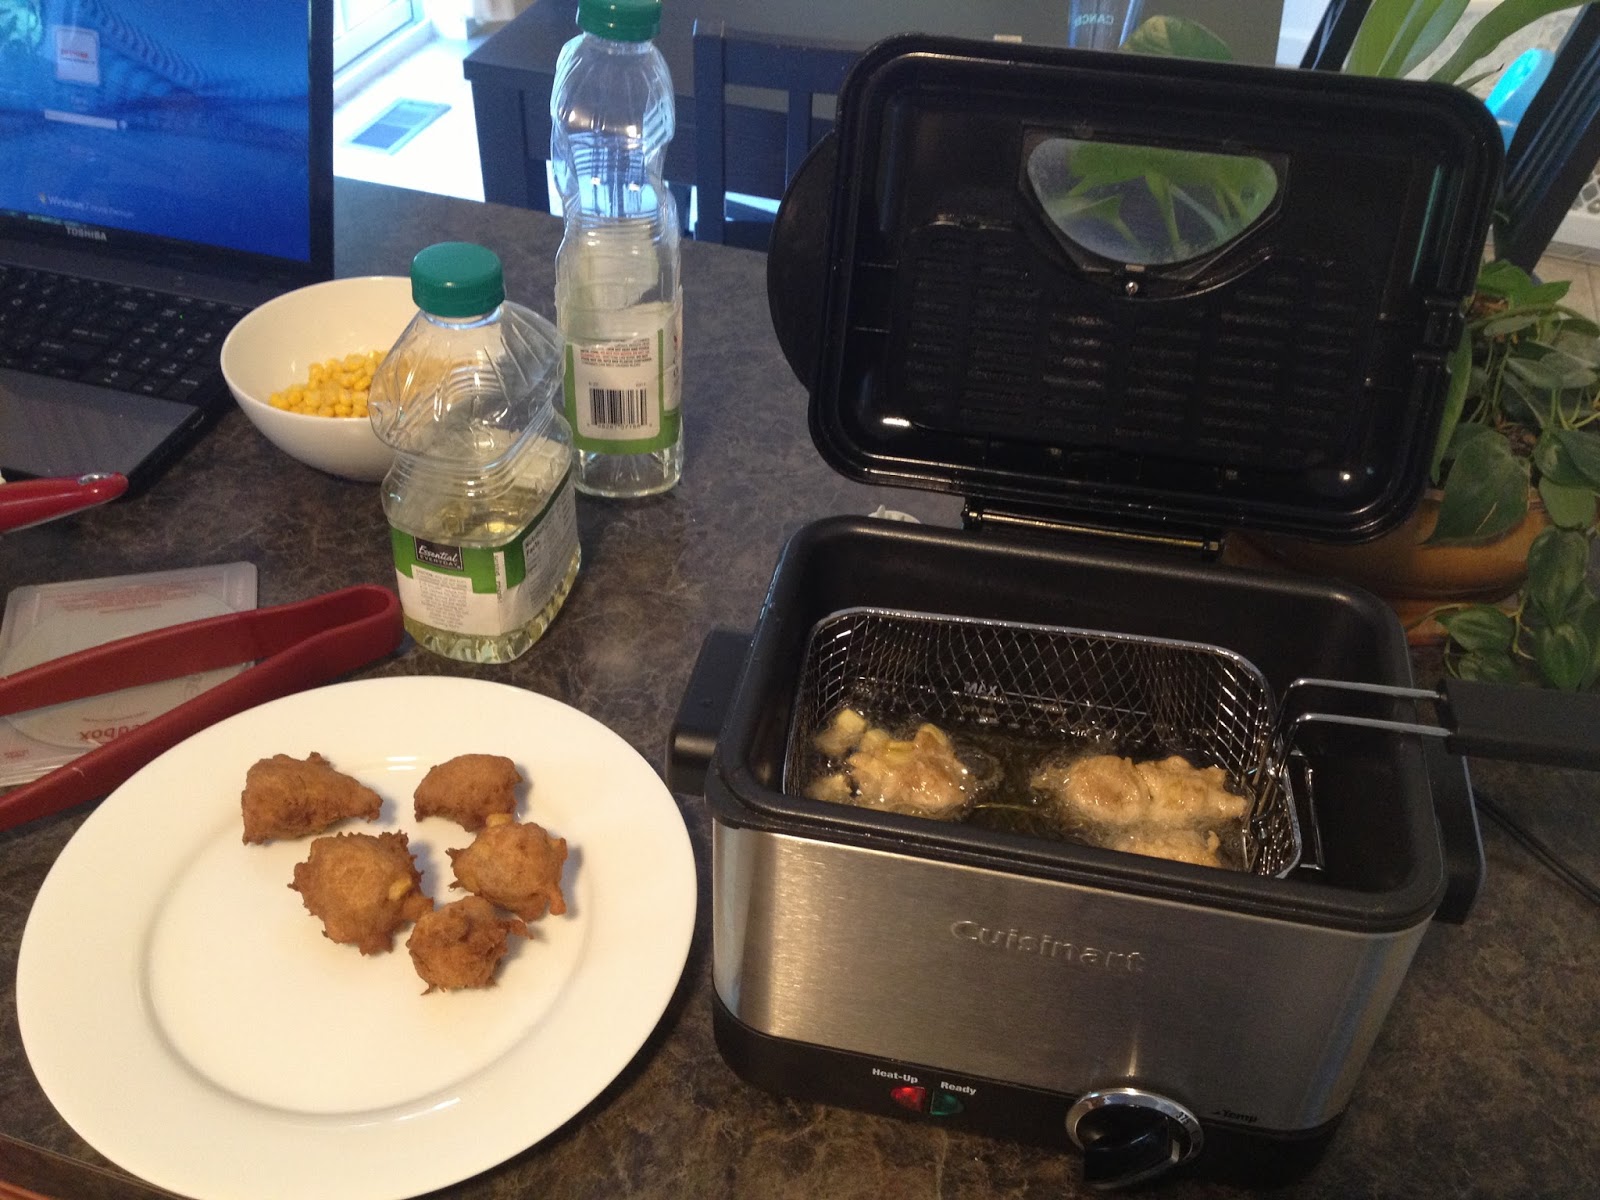
Oh my! Oh Yum! That's all I have to say. I was watching The Chew the other day and I saw Michael Symon make homemade corn fritters and he made it look so delicious and easy I just had to try it. And why not....I had my fryer out anyway! I did very little adapting of his recipe...mostly just telling you the brands I used and I did change the dipping sauce. So I still credit this recipe to Michael Symon.
Corn Fritters: (Original Recipe).
3 cups Organic Non-GMO Canola oil
1 cup plus 2 tablespoons Bob's Red Mill Organic White Flour
1 cup Bob's Red Mill Organic Fine Ground Corn Meal
1 teaspoon Baking Powder (recipe here)
1 1/2 tsp sea salt
1/4 cup sugar
1/2 tsp fresh ground coriander
2 eggs (lightly beaten)
1 cup Organic Pasteurized Whole Milk
1 1/2 cups Fresh or Frozen Corn Kernels
1 large jalapeno (seeded and minced)- from my garden and oh so good!
1/4 cup sliced organic scallions (green and white parts)
1/4 cup organic unsalted butter, melted
(I did not use...nor did I miss the lime)
Dipping Sauce:
Honey mixed with a small bunch of fresh cilantro chopped
Process:
Heat your oil to 350 degrees.
While the oil is heating, mix together the dry ingredients. In a liquid measuring cup, measure your milk and add the eggs to the milk and lightly beat the eggs. Add the egg/milk mixture to the dry ingredients and whisk until well incorporated. With a spatula, fold in the corn, jalapeno and scallions. When those are well incorporated fold in the melted butter. Don't over mix.
Take your metal 1 tablespoon measure and dip it into your hot oil. Then dip it into your batter and then drop the batter into the oil. Repeat until you have 4-5 balls in the oil, but don't over crowd them. Cook for 2-3 minutes or until golden brown. Remove and place on a plate with paper towels to drain. Serve with honey/cilantro dipping sauce.


Enjoy!
My Weekends Cooking
Recently we went to our local orchard to pick blueberries and walked out with a haul of blueberries, green beans, peppers, peaches and summer squash. We also walked away with an apple fritter my husband snuck in the cart. He also managed to eat it so fast I didn't even get to see it! But oh how he raved about how good it was. So I was determined to try to make him something similar. After I slaved in the kitchen yesterday (just kidding these are so easy to make), my husband says, "they are great, but not the apple fritter I had). In his defense his apple fritter was almost made with a pie crust? The ones I made were more like mini donuts.
So here is the recipe: Apple Fritters by seeminglygreek.com
The only thing I changed was that I used Bob's Red Mill Organic White flour, homemade baking powder, organic unsalted butter (I use Wegman's Organic Brand), I only used 1 apple which was 1 cup, and I used organic powdered sugar for the icing with organic whole milk. I found my organic powdered sugar at Trader Joes and Wegman's.


Enjoy!
Old Favorite Updated
I promised to update some of my old posts to make them MSG free and Migraine friendly. I couldn't figure out how to make the recipe show up as new again. So here is the post updated to fit the new diet. I hope you love it and add it to your recipe book soon!
Enjoy!

Enjoy!

Sunday, August 4, 2013
Peaches and Cream Ice Cream
Holy poop this recipe rocks...if I don't say so myself! So I had some really ripe peaches I needed to use up...enough cobbler already I think I made that recipe 4 times...and yes ate them all too! Something refreshing like peach ice cream sounds good to me!
So I have the Cuisinart Ice Cream Maker and I have to say it rocks. Although, we've never tried another one because we've been so happy with this one. The only thing that would make it better is if it cake with 2 bowls so you can make 2 ice creams one right after the other since you have the equipment and ingredients out.
Anyway, the inspiration for this recipe came from Curtis Aikens's Food Network Recipe. Being that I can't have brandy or lemon juice, I just admitted them from the recipe and I think it still tastes great!
Peaches and Cream Ice Cream:
In a medium saucepan combine 3/4 cup sugar, milk, heavy cream and vanilla. Bring just to a boil. As soon as it starts to boil slide off the heat because it will rapidly boil quickly and you don't want to do that.
In a bowl whisk egg yokes and as you are whisking them add 1/3 of the warm cream mixture to it. Once mixed, return the cream mixture to the stove and add egg mixture to the cream mixture while continuously whisking. Heat should be medium high. Cook until mixture thickens (can coat the back of a spoon). Once mixture has thickened and returned to a boil, remove from heat and strain. Add reserved peach juice, cover and refrigerate until chilled through or over night.
Transfer mixture to your ice cream maker (do not put warm mixture into ice cream maker!) and mix until thickened. Towards the end mix in the chopped peaches. Transfer to a Pyrex glass container and cover with plastic wrap before putting the lid on. Place in freezer to let it firm up more. Then enjoy!


So I have the Cuisinart Ice Cream Maker and I have to say it rocks. Although, we've never tried another one because we've been so happy with this one. The only thing that would make it better is if it cake with 2 bowls so you can make 2 ice creams one right after the other since you have the equipment and ingredients out.
Anyway, the inspiration for this recipe came from Curtis Aikens's Food Network Recipe. Being that I can't have brandy or lemon juice, I just admitted them from the recipe and I think it still tastes great!
Peaches and Cream Ice Cream:
- 2 cups chopped fresh, organic, ripe peaches (preferably peeled)
- 1 1/4 cups pure cane sugar
- 2 cups organic pasteurized whipping cream
- 1 cup organic pasteurized whole milk
- 1/2 teaspoon homemade vanilla extract or Trader Joes non-alcoholic vanilla extract
- 4 egg yokes
In a medium saucepan combine 3/4 cup sugar, milk, heavy cream and vanilla. Bring just to a boil. As soon as it starts to boil slide off the heat because it will rapidly boil quickly and you don't want to do that.
In a bowl whisk egg yokes and as you are whisking them add 1/3 of the warm cream mixture to it. Once mixed, return the cream mixture to the stove and add egg mixture to the cream mixture while continuously whisking. Heat should be medium high. Cook until mixture thickens (can coat the back of a spoon). Once mixture has thickened and returned to a boil, remove from heat and strain. Add reserved peach juice, cover and refrigerate until chilled through or over night.
Transfer mixture to your ice cream maker (do not put warm mixture into ice cream maker!) and mix until thickened. Towards the end mix in the chopped peaches. Transfer to a Pyrex glass container and cover with plastic wrap before putting the lid on. Place in freezer to let it firm up more. Then enjoy!


Yummy! Licking the back of the spoon at 10am when I made this wasn't good enough! Can't wait to have it later for dessert!
Enjoy!
Standard Pancakes
Who doesn't like pancakes on Sunday morning? Well I happen to like them any day of the week, breakfast, lunch or dinner! My inspiration for this recipe comes from The All New Joy of Cooking book page 795.
Now this recipe calls for baking powder so make sure you use Debbie's recipe for baking powder from the "Battling the MSG Myth" book. To remind you how to make it you simply mix 1/4 cup baking soda, 1/2 cup organic cream of tarter, 1/2 cup Bob's Red Mill powdered arrowroot. (Store in a glass jar for later use...I use this all the time!).
Standard Pancake Recipe:
In a large bowl whisk together:
In a separate smaller bowl whisk together:
You can mix in blueberries if you'd like.
Spoon 1/3 cup of batter, or less, onto a warm griddle pan. Cook until the top of each pancake is bubbly then flip and cook until the underside is lightly browned.
You can freeze these in containers with the pancakes separated by wax paper. They freeze very well. I usually double the batch and freeze at least half. Yes we love our pancakes.
For a great fall adaptation of this recipe, for one batch finely grate 1 organic sweet potato and fold it into the batter as the last step. Add about 4 big dashes of cinnamon or about 1/8-1/4 tsp. You can also do this with pumpkin puree. Both taste delish!


Now this recipe calls for baking powder so make sure you use Debbie's recipe for baking powder from the "Battling the MSG Myth" book. To remind you how to make it you simply mix 1/4 cup baking soda, 1/2 cup organic cream of tarter, 1/2 cup Bob's Red Mill powdered arrowroot. (Store in a glass jar for later use...I use this all the time!).
Standard Pancake Recipe:
In a large bowl whisk together:
- 1 1/2 cups King Arthur's White Whole Wheat Flour (can use Bob's Red Mill 100% Organic White flour or even King Arthur's 100% Wheat Flour...they all work and taste great).
- 3 tablespoons of pure cane sugar
- 1 1/2 teaspoons Debbie's Baking Powder Recipe
- 1/2 teaspoon Sea Salt
In a separate smaller bowl whisk together:
- 1 1/2 cups Organic Pasteurized (not ultra pasteurized) Whole Milk
- 3 tablespoons Organic Unsalted butter, melted
- 2 large eggs
- 1/2 teaspoon homemade vanilla extract (Trader Joes also sells a non-alcohol vanilla extract which works great, but is mighty expensive).
You can mix in blueberries if you'd like.
Spoon 1/3 cup of batter, or less, onto a warm griddle pan. Cook until the top of each pancake is bubbly then flip and cook until the underside is lightly browned.
You can freeze these in containers with the pancakes separated by wax paper. They freeze very well. I usually double the batch and freeze at least half. Yes we love our pancakes.
For a great fall adaptation of this recipe, for one batch finely grate 1 organic sweet potato and fold it into the batter as the last step. Add about 4 big dashes of cinnamon or about 1/8-1/4 tsp. You can also do this with pumpkin puree. Both taste delish!


(Topped with farmers market blueberries and local farmers market maple syrup and you can't go wrong!)
Enjoy!
Thursday, August 1, 2013
Parsley Potatoes
The other night my husband and I wanted to do something different for dinner. Steak it was. I had bought grass fed organic strip steak (or maybe it was skirt steak...who knows!) from our local grocery store and just needed to find a good recipe to use it in. That's where Michael Symon's recipe for strip steak with compound butter comes in hand. I made the whole amount of butter and dry rub that the recipe called for even though I only made one 6oz steak. I was able to freeze the left over butter and I packaged up the left over dry rub for a future steak.
Now on to the main event. My favorite potatoes! Yummy! Start by boiling 1 1/2 lbs or red potatoes. Preferably the smaller ones. They work better for this. Meanwhile you make your basic white sauce. Start with 4 tablespoons of unsalted organic butter and melt in a medium sauce pan over medium high heat. Add in 1 tsp of minced garlic. Then stir in 4 tablespoons of flour. I used Bob's Red Mill organic white flour. Once flour is cooked off and you have a sandy texture add in 2 cups of whole organic pasteurized milk. Whisk continually until thickens. Add salt and pepper to taste (about 1/2-1 tsp salt and 1/4-1/2 tsp pepper), 3 big dashes of paprika, 1 tablespoon of parsley, 1 tablespoon of fresh diced chives, and 2 dashes of fresh grated nutmeg. Taste to make sure seasoned well. Pour over drained and sliced in half potatoes and serve warm...that's if they make it to the table.
A side of broccoli, the steak and potatoes and it was a perfect meal.
Enjoy!
Tuesday, July 30, 2013
Busy Bee
So I've been a busy bee this past week. Between making bread, recipe hunting, freezing fruits and vegetables for the winter, freezing more fruits and vegetables for the winter, drying herbs and taking care of my son, I've been remiss in posting. Sorry! I have a lot to share though so keep with me.
This post is going to be kinda random. I am going to post links to some of my favorite sites/recipes that I've come to love and rely on since on this diet.
Here is the recipe I used for homemade vanilla extract. I highly recommend beanilla.com for buying the premium Madagascar vanilla beans. However, after reading their reviews I bought my jars off of amazon.com. I saved more on them, they came unbroken, dark in color and perfect size. Here are the links for all three:

So I said I've been freezing lots of vegetables for the winter. I found the best book ever. Not only does it tell you how to prep and freeze all vegetables, but it usually tells you how long you can freeze them for and also how you can use them once thawed (ie: baked goods only, cooked only). This book also includes recipes and tells you how much each vegetable yields in pounds, pints, bushels, cups, etc. I've found this extremely helpful in comparing prices from grocery store vs. farmers markets/orchards. And yes...you can also find most of this info via the internet these days, but now I have all the info I need in one spot and don't have to Google each vegetable every time I need to freeze.
Now for the good stuff....DESSERT! For our anniversary, my husband and I were looking for a new, fun, quick and easy recipe. Thanks to Food Network and Alton Brown we found an excellent recipe. Individual portions of peach upside-down cake. So the only catch is that you have to watch his 3 min video and pause it as you cook in order to get the recipe. He measures his flour on a scale as well...but don't worry I researched it and his measurement equals 9 tablespoons of flour. I made 8 of these the first time and I'm so glad I did. Yummo! Also, I used 7oz ramekins not 6oz.

Ok today I got a little risky and tried a new recipe for Panini bread (yes I feel more confident working with yeast). I have to admit that I didn't even see the pictures all the way at the bottom and my bread still turned out PERFECTLY! This is the best recipe ever! I used Bob's Red Mill 100% organic white flour. You will want to make this recipe tomorrow!

Ok I think that is enough for now. None of these sites paid me for passing on their recipes or their info. I just want to share what has been helpful to me.
Enjoy!
This post is going to be kinda random. I am going to post links to some of my favorite sites/recipes that I've come to love and rely on since on this diet.
Here is the recipe I used for homemade vanilla extract. I highly recommend beanilla.com for buying the premium Madagascar vanilla beans. However, after reading their reviews I bought my jars off of amazon.com. I saved more on them, they came unbroken, dark in color and perfect size. Here are the links for all three:
- Vanilla Beans Bought Here: http://www.beanilla.com/madagascar-vanilla-beans (currently on sale!)
- Boston Round Bottles Here: http://www.amazon.com/gp/product/B003G2ZXKQ/ref=oh_details_o00_s00_i02?ie=UTF8&psc=1
- Recipe Here: http://tidymom.net/2012/recipe-for-vanilla/ I put 8 half pieces in each jar.

So I said I've been freezing lots of vegetables for the winter. I found the best book ever. Not only does it tell you how to prep and freeze all vegetables, but it usually tells you how long you can freeze them for and also how you can use them once thawed (ie: baked goods only, cooked only). This book also includes recipes and tells you how much each vegetable yields in pounds, pints, bushels, cups, etc. I've found this extremely helpful in comparing prices from grocery store vs. farmers markets/orchards. And yes...you can also find most of this info via the internet these days, but now I have all the info I need in one spot and don't have to Google each vegetable every time I need to freeze.
- Here is the book: http://www.amazon.com/The-Practical-Produce-Cookbook-Hoover/dp/0965684296/ref=sr_1_1?ie=UTF8&qid=1375228675&sr=8-1&keywords=the+practical+produce+cookbook
- Here is the bread recipe: http://www.instructables.com/id/Homemade-Bread-Recipe/?ALLSTEPS

(can you tell I forgot the egg wash on one loaf...but I would have had enough egg wash with just 1 egg!)
Now for the good stuff....DESSERT! For our anniversary, my husband and I were looking for a new, fun, quick and easy recipe. Thanks to Food Network and Alton Brown we found an excellent recipe. Individual portions of peach upside-down cake. So the only catch is that you have to watch his 3 min video and pause it as you cook in order to get the recipe. He measures his flour on a scale as well...but don't worry I researched it and his measurement equals 9 tablespoons of flour. I made 8 of these the first time and I'm so glad I did. Yummo! Also, I used 7oz ramekins not 6oz.
- Here is the recipe: http://www.foodnetwork.com/videos/peach-upside-down-cake/51213.html (Remember peaches are on the dirty dozen list. Buy organic when possible!)

Ok today I got a little risky and tried a new recipe for Panini bread (yes I feel more confident working with yeast). I have to admit that I didn't even see the pictures all the way at the bottom and my bread still turned out PERFECTLY! This is the best recipe ever! I used Bob's Red Mill 100% organic white flour. You will want to make this recipe tomorrow!

(easiest bread ever to make!)
Ok I think that is enough for now. None of these sites paid me for passing on their recipes or their info. I just want to share what has been helpful to me.
Enjoy!
Wednesday, July 24, 2013
Fantastic Gluten Free Chili

So here goes nothing:
Karin's Gluten Free (but tasty) Chili
Ingredients:
1 tablespoon EVOO
4 cloves garlic, minced or about 2 tsp.
1 bunch of green onions, diced (or about 1/2 cup)
2 jalapenos, seeded, stemmed, diced
1 large yellow bell pepper, seeded, cored, diced
1 large green pepper, seeded, cored, diced,
2 medium carrots, sliced
2 cups banana or butternut squash, diced (not too small)
2 medium sweet potato, peeled, diced (not too small)
2 cups homemade chicken broth
3 14.1 ounce cans of Bionaturae diced tomatoes (don't have onions or citric acid)
1 15 ounce can Nature's Promise Organic black beans
1 tsp organic ground cumin, or to taste
1 tsp gluten free curry, or to taste
1 tsp or more of organic sea salt
1/2 tsp ground black pepper
Pour the EVOO into a slow cooker or crock pot (I used a crock pot on low). Add the garlic and onion and stir to coat. Add the remaining ingredients. Stir and let cook 2-4 hours on low. Before serving taste for seasoning. Could add ground beef or chicken if desired.
Serves well over rice or with gluten free corn muffins.


Enjoy!!!
Thanks Gluten-Free Goddess for the recipe inspiration.
Monday, July 22, 2013
Chicken Pot Pie Get In My Belly!
A few years back I happened across this recipe for chicken pot pie by Tammy's Recipes. After tasting that chicken pot pie I never made another one again. I was sold! This truly is the best pot pie ever!
However, now that I am on an MSG/Migraine Diet I needed to adapt this recipe to fit my new restrictions. So here is how I did it...and I got to say it still tastes DELISH!
Ingredients For Filling:
2 tablespoons of organic unsalted no MSG butter or salted no MSG butter
4 cloves of garlic
1/2 cup diced spring onions
1 1/2 cups diced organic carrots
2 tsp sea salt
1/2 tsp pepper
3 cups organic chicken broth or vegetable broth (will post my recipe next)
1 1/2 cups frozen sweet corn
1 1/3 cups organic pasteurized (non ultra pasteurized) Whole Milk
1 cup King Arthur's 100% White Whole Wheat Flour
4 cups organic cooked chicken
In a large saucepan on stove top, combine butter, garlic, onion, carrots, salt, pepper, and chicken broth. Bring to a boil and simmer until carrots are tender.
When carrots are tender, add the corn and simmer for 5 minutes more. Whisk together the flour and milk. Add to boiling mixture and stir until thickened. Remove from heat. Add chicken and stir. Taste to see if needs more salt and pepper.
Ingredients for Crust: (based on this recipe)
2 1/2 cups 100% white whole wheat flour- King Arthur's
1/2 tsp sea salt
1 cup butter, chilled and diced
1/2 ice water
In large bowl, combine flour and salt. Cut in butter until mixture resembles coarse crumbs. Stir in water, a tablespoon at a time, until mixture forms a ball. Wrap in plastic and refrigerate for 4 hours or overnight.
Roll two thirds of the dough out for the bottom and sides of your 13 x 9 inch baking dish. Fill your dish with the pot pie filling. Roll rest of the dough out for the top of the filling. Using a knife cut slits into the dough. Bake at 425 degrees for 20-25 minutes or until brown.
Thank you Tammysrecipes.com for the inspiration for this recipe!
Enjoy! Pictures to come soon :)
Wednesday, July 17, 2013
Peach Cobbler

So my uncle requested the cobbler while on vacation and I honestly thought I preferred crisps more then cobblers and I thought that cobblers were complicated to make so I had never made one before. He assured me that it was easy to do "a cup a cup a cup". HUH!? So that's what he told me to Google and here is the first website that came up; cup-a cup-a. Her recipe and step by step instructions make it so easy to follow.
I only have a couple adaptations to make to this recipe so all credit goes to Cup-a Cup-a for a great recipe.
Ingredients:
1 1/4 cup sugar
1 cup organic white whole wheat flour (I use King Arthur's)
1 cup organic pasteurized whole milk
1/2 stick organic unsalted butter, melted (can use tub butter or stick- both worked successfully)
2 cups of organic fruit cubed (I didn't have a measuring devise so I used 5 fresh ripe peaches cubed).
You will also need butter to butter your baking dish. You can use a 9" pie plate or a 9" square baking pan.
It is important to mix the ingredients in a specific order.
First mix 1 cup of the sugar with the flour in a medium mixing bowl with a whisk. Next add the milk just until blended. Lastly, add the melted butter and mix. Take your baking pan or Pyrex dish and take all natural canola oil spray or tub butter and grease your baking pan. Place the dough in the pan.
Take fresh fruit (cubed if peaches) and sprinkle over the top. I sprinkled the remaining 1/4 cup sugar over the peaches once in the pan, but the original recipe has your mix it in with the fruit first. Either works well I just made it simpler.
Bake at 350 in the center of the oven until golden and bubbly. Should take between 40 minutes and an hour. I baked mine for 1 hour.
Serve with vanilla ice cream and Enjoy!

Monday, July 15, 2013
Cherry Kuchen Bars

Cherry Kuchen Bars
(recipe adapted from p. 71 of Better Homes and Gardens Special Interest Publications 100 Best Cookies)
First make the homemade Cherry Pie Filling (my recipe as adapted from Tammy's Recipes.com Cherry Pie Filling)
- 3 cups bing or dark cherries
- 1 1/2 cups pure cane granulated sugar
- 2 tablespoons arrowroot powder mixed with 2 tablespoons cold water.
Combine fruit and sugar in a large sauce pan and stir together. (If cherries are really firm add up to 1/2 cup of water- mine were very ripe so I didn't add water). Bring to a boil.
Mix 2 tablespoons arrowroot powder with 2 tablespoons cold water. Whisk to make sure there are no lumps.
When cherries are boiling, add thickening while stirring constantly to prevent any lumps. Mixture will thicken and slightly reduce as you continue to simmer it. If it's not thickening to the desire you want add more thickening agent. Continue to stir and allow to bubble until juices run clear or there are no more tiny pink bubbles on top. Make sure you don't over cook the cherries or they will break down. Set aside and prepare your dough
Dough:
1/2 cup organic unsalted butter, softened
1/2 cup shortening (Spectrums Naturals All Vegetable Shortening, Organic)
1 3/4 cup pure can granulated sugar
1/2 tsp homemade baking powder (see previous post)
1/2 tsp Organic Sea Salt
3 Eggs
1 Tsp Vanilla Extract (will be making my own from now on using vodka and vanilla beans- bourbon causes migraines)
3 cups Bob's Red Mill Organic Unbleached White Flour
Preheat oven to 350 degrees. In a stand mixer beat butter and shortening on medium speed for 30 seconds. Add sugar, baking powder, and salt. Beat until combined, scraping side of bowl occasionally (or get the new beater that scrapes the sides as you go and you don't have to stop!!!). Beat in eggs and vanilla until combined. Beat in flour until mixed. Reserve 1 1/2 cups of the dough. Press the remaining dough into the bottom of an ungreased 15x10x1 baking pan.
*I tried a 13x9 the second time I made it and it wasn't the same so stick to the 15x10x1.
*also I didn't grease the first time and I'd grease the sides just because the cherry filling can stick to the side, but I wouldn't grease the bottom because of the shortening in the dough.
Bake the bottom dough layer for 12 minutes. Remove from the oven and spread the pie filling over the crust in the pan. Spoon reserved dough into small mounds over the pie filling.

Bake from 30 minutes more or until top is light brown. Cool in pan on a wire rack for 10 minutes. Drizzle with Powdered Sugar Icing. Cool; cut into bars. Makes about 32.
Powdered Sugar Icing: In a small bowl combine 1 1/2 cups powdered sugar (Trader Joes Organic Powdered Sugar), 1/4 tsp homemade vanilla extract and enough organic whole milk to make icing drizzling consistency (I used 5-6 tsps. but recipe said to only use 3 to 4).


To store: layer unfrosted bars between sheets of waxed paper in airtight container; cover. Store in the refrigerator for up to 2 days or freeze for up to 3 months.
You're gonna want to make this tonight!!!! Well worth it and tastes great the next day...trust me :)
Enjoy!
Snacking
This word has been the death of me lately (snacking) because with all of the restrictions I had the hardest time finding snacks I could eat that wouldn't give me a migraine and didn't contain some form of MSG.
Well I am here to tell you that there are snacks out there that you can eat and its not just raw fruits and vegetables, which as good as they are, they are not that filling or what you want to eat all the time.
So here are a few of my favorites:
That's my list for now, but as I create or find others that are safe and delish I will be sure to share them. This list offers me the variety I need and fills me up with the calories needed to feel full and satisfied.
Enjoy!
Well I am here to tell you that there are snacks out there that you can eat and its not just raw fruits and vegetables, which as good as they are, they are not that filling or what you want to eat all the time.
So here are a few of my favorites:
- Trader Joe's Sea Salt Potato Chips
- Garden of Eatin Tortilla Chips (most varieties as long as they have sea salt)
- Homemade Popcorn (yes my hubby bought me a popcorn maker-he's a keeper!)
- Tortilla Chips and Salsa
- Homemade Oatmeal Raisin cookies with sulfite free raisins (I use Trader Joes)- use all white sugar and no brown sugar.
- Sunflower Seed Butter with apples (see previous post for recipe for Sunflower Seed Butter)
- Sensible Portions Original Sea Salt Pita Chips (I called to verify their flour had no malted barley and it is safe!)
- Tammy's Rosemary Crackers - the best wheat thin recipe I've found and I've made and thrown out others that were nasty!
That's my list for now, but as I create or find others that are safe and delish I will be sure to share them. This list offers me the variety I need and fills me up with the calories needed to feel full and satisfied.
Enjoy!
Homemade Baking Powder Recipe
I can not take any credit for this recipe other then to say that it has worked in every cookie and pastry recipe I've made so far as well as in pancakes. This recipe comes from Debby's book "Battling the MSG Myth A Survival Guide and Cookbook.
Homemade Baking Powder:
Mix and store in a glass jar: 1/4 cup baking soda, 1/2 cup cream of tarter, 1/2 cup powdered arrowroot.
I use Bob's Red Mill Arrowroot Powder.
*Also some people may react to the cream of tarter used in this recipe as it is made from fermented grapes that could contain glutamate and/or sulfites so see if this works for you in a few recipes before making a huge batch.
Enjoy!
A long over due posting
So previously I posted on the changes to come in the way I eat and live my life. Because these changes have been a lot to adjust too, accompanied by a two week vacation, I've been delayed in posting. No worries though! I have a wealth of info, health and recipes to share. Yes I am (other then the random headache today) feeling 100% better.
After numerous visits to Wegmans, our local Giant grocery store, my local Orchard which I am now in love with, and our local farmers markets I can positively say my freezer is full of organic or locally grown fruits and veggies so that my family and I can enjoy them all winter long and my cabinets are full of natural and organic flours, grains, snacks and much more!
I'm also drug free. Yes no more asthma meds, allergy meds, nada! The money I'm saving by not refilling these will go towards investing in more kitchen gadgets and more organic fruits and veggies :)
So although this diet (Dr. Buchholz's and the Battling the MSG Myth diet) might not be for you, it was for me. It saved my life and prevented me from having a major surgery that would have been unnecessary.
From here on out all of my recipes will be MSG free and free of anything that would cause a migraine according to the Dr. Buchholz's preventative diet. I will name drop a lot of the brand names I use for flours and grains and what not because it took a lot of time and energy to find ones that were "safe". I am in no way getting paid by any of these companies. Just saving a fellow sufferer the time and headache. I am also not a doctor so if you are more sensitive to certain triggers then me please note that I avoid the triggers listed in Dr. Buchholz's diet in addition to most of the triggers listed in the MSG Myth book and your doctor may have you avoid different ones. Please feel free to comment at any time if you have questions.
I will start by posting some of the basic recipes I started with and will then get into the fancy ones I've now come to love! Happy cooking!
Wednesday, June 19, 2013
A Change Is Coming...
What kind of change you might ask? A Life Change (No I am not pregnant). A change in the way I eat and live my life. Why you might ask? For the last 9 months I have seen over a dozen specialists and been to more doctors appointments then I care to remember. There were days I couldn't get out of bed the pain in my face was so painful it hurt to think about it. Numerous drugs later, a scheduled brain surgery and finally an answer came. After seeing my neurologist at Hopkins it was discovered that my migraines took a turn for the worse and were becoming debilitating. All of the pain I was exhibiting was a new way of my migraines presenting.
So what does that mean for me. No more drugs and back on Dr. David Buchholz's diet. It also means no brain surgery!!!! :) It was also discovered in the process that I have a high intolerance for any form of MSG....urgh, I cringe at even saying that word MSG. Don't get me started on how our government has allowed MSG to be in our foods and half of the times it isn't even labeled. By the way...how can a food be considered organic if it has MSG in it?
Did you know that MSG has over 30 different names? Try these names on for a try: calcium caseinate, monosodium glutamate, hydrolyzed protein, yeast extract, whey protein, natural flavors, malted barley, malt extract, malted barley flour, maltodextrin, carrageenan, ultra-pasteurized items, enzyme-modified items, broth, stocks, textured protein, sodium casinate, soy protein and many more. The list goes on and on and these are just a few of the hidden names for MSG. Are you looking at the labels of what you are putting in your mouth?
So how do you go MSG free while also following Dr. Buchholz's diet for migraine prevention? The first step for me was to clean out my fridge and cabinets and stock pile of foods that I had in my house. This was no easy task for me because I stock pile chocolate chips, flour, butter and much more for all of the baking projects that I do. Well no more. The next step for me was rereading Dr. Buchholz's book "Heal Your Headache The 1-2-3 Program for taking charge of your pain and also reading a new book by Debby Anglesey called "Battling the MSG Myth, a Survival Guide and Cookbook". Both of these books have been instrumental in my changing process.
Then I started the research from home of looking at food items online from local grocery stores so that I could have my books in front of me as a reference. I made the list of staple items I needed: an organic butter, organic vitamin D milk, flour without malted barley, vegetables (preferably organic and not sprayed with pesticides which also have MSG), organic fruits (same thing), and of course my staple snack items so that I wasn't tempted to cheat.
Numerous trips to Wegmans, Giant and Trader Joes and I'm on the right track. Mind you I've been living in my kitchen or the grocery store lately (my poor son!). But I can proudly say that on a good day I feel 90 percent better and on a rough day I'm about 75% better. So overall I feel great. I even feel great about all of my "crunchy" measures that I've taken. Yes I just called myself crunchy. That's because shampoo and conditioner have MSG ("No shampoo is better!). Sorry just had to add that line from a favorite movie. Yes it is true our shampoo and conditioners and even toothpaste have MSG in them and MSG can be absorbed through the skin. So for me that meant finding an alternative. There are shampoo's out there that are safe, however I also get migraines from nuts and their oils so coconut oil is out for me. As a substitute I wash my hair with baking soda mixed with warm water. I rinse with vinegar and when I want a good conditioner I use aloe gel that I've processed so it's not chunky. It stinks but man my hair has never been so straight and shinny!
Overall this process has been a huge change for me, but very rewarding. If you suffer from migraines like me I would suggest the two books I listed above. If you have an illness that can't be diagnosed I suggest reading the Battling the MSG Myth book or checking out their website at www.msgmyth.com. Debby believes MSG can cause migraines, ADD, ADHD, myopia, type I diabetes, high blood pressure, type II diabetes, obesity, depression, autism, asthma, and ALS.
So back to the cooking world and the reason I started this blog. I've discovered and adapted a few recipes recently to fit my new "diet". Look for a fabulous salsa, taco shell and taco meat recipe, stuffed green pepper recipe, and homemade macaroni recipe to be posted soon.
I hope that if you suffer from migraines or an MSG intolerance like I do that my new recipes will be of huge help to you. And if not I promise as much of a food junky as I am that these recipes are all delicious.
Enjoy!
Monday, June 3, 2013
My Small Space Herb Garden
 Ok so here is the deal. Every April is clean out my spice cabinet time of the year. I learned from watching "The Chew" that you are supposed to date your dried spices at the time you purchase them and throw them out after one year. I can't tell you how many spices I waste. Don't get me wrong I use a lot of spices, but some of the more unusal ones like Tarragon and Sage and Marjoram I don't use as often. Others I go through so quickly I might as well own stock in them. That's when I decided it was time to plant an herb garden. One that would fit in our small space (we live in a town house), and one that I could bring inside in the winter so that I'm not losing all my efforts from the summer.
 So Pinterest searching I went. I needed some inspiration. That's when I came across this site which used a trellis as the anchor for their herb garden.
Then it was off to Lowe's we went. We found lots of trellis's. Free standing ones, ones you can hang, ones that you anchor into the ground, wood ones and even metal ones! Together my husband and I decided we would do a free standing one so that I could bring the garden inside in the winter. Fresh herbs year round...why not!? Some "S" hooks and tin cans later and we had the start of our project. We did purchase the tin cans from ACMOORE. They were half off and the perfect size for the opening of each row on the trellis (I will let you know if the tin cans was a good idea. A good friend just informed me the tin might get really hot and dry out the herbs).
My husband and I also sat out on the deck last night (until it started raining) and we painted the names of each herb on the tin cans with acrylic paint. You could use chalk board paint for a differnt look.
Take a look!


I need to buy some more herbs from our local farmers markets, but I'm very excited at the progress so far! Yeah for home ground herbs! The total for this project was $20.00 trellis, $15.00 for tin cans, $6.00 for "S" hooks, I had oregano and basil, I purchased parsley and thyme for $5.00 total at the farmers market. That brings the total to $46.00 so far. Not to shabby! And I hopefully won't have to buy many store bought herbs ever again! Yeah!
Hope this craft project brings you some inspiration!
Enjoy!
Chicken Gyro's
 Well the local Greek Church just had their annual Greek Festival full of mighty fine tasting food and it inspired me to try out making chicken gyro's myself. I found this fairly simple recipe online. Of course I needed to adapt parts of it. This is one recipe however that the credit needs to stay with Mel's Kitchen Cafe and Chef in Training because I adapted very little of the recipe. I kept the Naan recipe and the Tzatziki sauce exactly as they created it.
 First you should start by making Mel's Kitchen Cafe's Recipe for Naan:
3-4 cups of flour (I used 3 1/2 cups of white whole wheat flour)
1 tsp salt
1/2 tsp active dry or instant yeast (I used active dry)
1 1/2 cups of milk (I used 1 percent)
1 tsp sugar
3-4 tbsp melted butter (I used maybe 1 tablespoon)
Pour the milk into a liquid measure and heat in the microwave until warm to the touch (it took 1 1/2 minutes for me or until instant-read thermometer reads 110 degrees F). If using active dry yeast, mix the sugar and yeast into the milk and let sit for 4-5 minutes until the mixture is foamy and the yeast has activated.
Once the yeast/milk mixture is foamy pour the mixture into a large bowl or the bowl of a stand mixer and add the salt and 2 1/2 cups of the flour (proceed with the second paragraph of the recipe). If using instant yeast, pour the warm milk into a large bowl or the bowl of an electric stand mixer. Add the sugar, instant yeast, salt and 2 1/2 cups of the flour. Proceed as directed below.
Mix well to combine. Continue adding flour gradually in small amounts, until a soft dough is formed that cleans the sides of the bowl.
Knead the dough by mixer or hand until it is smooth and elastic, about 3-5 minutes in the mixer or 10 minutes by hand.
Place the dough in a lightly greased bowl (this was only spot I found the need for the melted butter) and let it rest at room temperature, covered lightly with greased plastic wrap, for about 2 hours.
After the dough has rested, turn it onto a lightly floured surface (I like to use my roul’pat for this) and divide the dough into 12 equal pieces, rounding each into a ball shape. Cover the pieces with a towel and let them rest for 30 minutes.
While the dough rests, preheat your oven to 500 degrees F and place a pizza stone on the bottom rack of the oven.
Once the dough has rested for 30 minutes, one by one, roll each piece into a circle about 6-8 inches wide, depending on how thin or thick you want your naan (***or use a tortilla press like I did- perfect each time and same size each time). Lay the circle of dough on the hot pizza stone and spritz lightly with water.
Close the oven and bake the naan for 2-4 minutes, until it is lightly puffed (some pieces will puff more than others) and brown spots begin to appear on the top.
Remove the naan from the baking stone and place on a cooling rack. Brush lightly with melted butter (rereading the directions I guess this is where you use the butter. Oops!). Stack the hot naan on top of each other as it comes out of the oven.
Cover with a towel and let the naan cool completely or serve warm.
Gyro Chicken Recipe:
6 tablespoons white white (original recipe said use 2 medium lemons)
1/2 cup vegetable oil
8 cloves of garlic minced (or jared minced garlic 4 tsp)
2 tsp oregano (I used dried)
2 tsp salt
1/2 tsp pepper
3 lbs boneless skinless chicken breasts (I used 5 chicken breasts)
Place everything but the chicken in a zip lock bag. Mix ingredients and then place the chicken in the bag and seal. Marinate in the fridge for 2-4 hours turning the chicken frequently. Grill the chicken over medium heat until the juices run clear.
Tzatziki Sauce: (*not my recipe)
1 1/2 cup plain yogurt
1/4 cup cucumber grated finely (squeeze out excess liquid)
2 tsp garlic
1/4 tsp salt
1 tbsp olive oil
1 1/2 tsp vinegar
Mix together and serve over gyros.
Here are some photos of the process. I will post a finished picture of the gyro as we eat them for dinner tonight!


** If you are interested here is the link to the tortilla press we bought. I love it. It's compact and uses very little arm strength to flatten the dough out. I got nice even naan each time. Would definitely recommend getting one of these. Made the process so much easier and you can use them to make your own soft taco tortillas...one less thing to buy from the store that is full of lots of unknown named ingredients. (Can you tell I'm not a fan of processed foods!)
*** Also the process seems lengthy, but I promise you it's not. The sauce took 2 minutes. The chicken marinade took 2 minutes then you grill. The naan was lots of steps, but no one step took a long time. Well worth it for the taste!
Enjoy!!
Subscribe to:
Posts (Atom)